- 1. Click Windows Start Button, right-click Computer > Properties.
- 2. Click Remote Settings
- 3. Under the Remote Desktop heading, click the middle bullet. This choice will allow both old versions of Remote Desktop (RDP) to connect to your Windows 7 machine, including Windows XP, etc.
- Click on Start, select Control Panel and then double-click on System.
- Select Remote settings on the left.
- When the window opens up select Allow connections from computers running any version Remote Desktop (less secure), as shown below.
How do I enable remote access on Windows 7?
Windows 7 and early version of Windows 10 To configure your PC for remote access, download and run the Microsoft Remote Desktop Assistant. This assistant updates your system settings to enable remote access, ensures your computer is awake for connections, and checks that your firewall allows Remote Desktop connections.
How to allow standard user to RDP/Remote Access on Windows 7/10?
How to Allow Standard User to RDP/Remote Access on Windows 7 and 10 Allowing Standard User in Windows 7 and 10 Method 1: Adding Standard User in System Properties (Win 7 & 10) Method 2: Adding Standard User in Local Users and Groups (Win 7 & 10) Method 3: Adding Standard User using PowerShell (Win 10)
How do I give/restrict access to a folder in Windows 10?
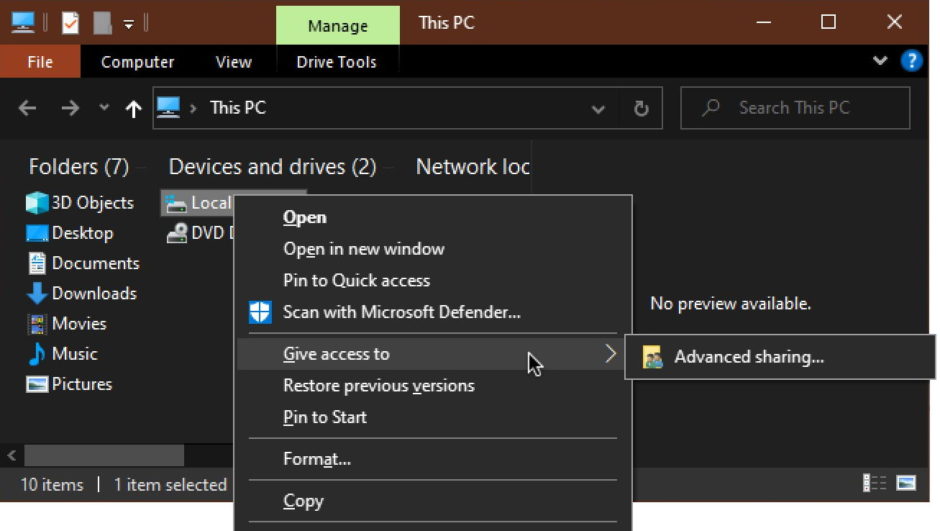
Open Users folder and select the user folder to which you want to give/restrict access. Right click on the user folder and select Properties from the context menu. Click on Sharing tab and click on Advanced sharing from the window. Enter administrator password if prompted. Check the option Share this folder and click on Permissions.
How to grant permissions in Windows 7?
How to Grant Permissions in Windows 7 1. Locate the file or folder on which you want to take ownership in windows explorer 2. Right click on file or folder and select “Properties”from Context Menu 3. Click on Edit button in Propertieswindows Click ok to confirm UAC elevation request. 4.

How do I enable remote access on Windows 7?
How to Enable Remote Access Windows 7Step 1: Launch the "Start" panel.Step 2: Right-click the "Computer" icon.Step 3: Select "Properties."Step 4: Select "Remote Settings."Step 5: Click the "Allow connection from computers running any version of Remote Desktop (less secure)" option.Step 6: Select "OK."
How do I configure share permissions from a remote computer Windows 7?
1:015:48Configure and use your Windows 7 Remote Access - YouTubeYouTubeStart of suggested clipEnd of suggested clipSystem settings. And then go to the remote tab on the remote. Tab. I can allow remote assistanceMoreSystem settings. And then go to the remote tab on the remote. Tab. I can allow remote assistance connections to this computer. So we'll check that box and if we click the advanced.
How do I enable remote access permission?
Allow Access to Use Remote Desktop ConnectionClick the Start menu from your desktop, and then click Control Panel.Click System and Security once the Control Panel opens.Click Allow remote access, located under the System tab.Click Select Users, located in the Remote Desktop section of the Remote tab.More items...•
How do I give admin rights to a remote user?
Click the "Groups" folder in the Computer Management window rather than "Users." Select the "Remote Desktop Users" group and then use the "Add" button in the Properties window to add all members of "Administrator" group as authorized users.
How do I enable C$ admin share?
Enable Administrative C$ ShareAt the computer, open Computer.Right-click the C drive and select Properties.In the Properties box, select the Security tab and verify that the Administrator's group has full privileges.To set up C drive sharing with a specific account, select Sharing and click Advanced Sharing.More items...
Does Windows 7 have Remote Desktop?
Hit Start, type “remote access,” and then click the “Allow remote access to your computer” result. In the “System Properties” window, on the “Remote” tab, select the “Allow remote connections to this computer” option.
How do I manually grant permissions to Remote Desktop?
Allow Access to Use Remote Desktop ConnectionClick the Start menu from your desktop, and then click Control Panel.Click System and Security once the Control Panel opens.Click Allow remote access, located under the System tab.Click Select Users, located in the Remote Desktop section of the Remote tab.More items...•
How do I add remote user?
Add Users to Remote Desktop in Windows 10Press Win + R hotkeys on the keyboard. ... Advanced System Properties will open.Go to the Remote tab. ... The following dialog will open. ... The Select Users dialog will appear. ... Select the desired user in the list and click OK.Click OK once again to add the user.
Why can't I remote into another computer?
Go to the Start menu and type “Allow Remote Desktop Connections.” Look for an option called “Change settings to allow remote connections to this computer.” Click on the “Show settings” link right next to it. Check the “Allow Remote Assistance Connections to this Computer.” Click Apply and OK.
How do I enable Remote Desktop without admin rights?
Go to the GPO section Computer Configuration -> Windows settings -> Security Settings -> Local policies -> User Rights Assignment; Find the policy Allow log on through Remote Desktop Services; After the server is promoted to the DC, only the Administrators group (these are Domain Admins) remains in this local policy.
What is remote admin access?
Alternatively referred to as remote administration, remote admin is way to control another computer without physically being in front of it. Below are examples of how remote administration could be used. Remotely run a program or copy a file. Remotely connect to another machine to troubleshoot issues.
What permissions do remote desktop users have?
By default, the Remote Desktop Users group is assigned the following permissions: Query Information, Logon, and Connect.
How do I fix permissions denied in Windows 7?
Right-click the file or folder, and then click Properties. Click the Security tab. Under Group or user names, click your name to see the permissions you have. Click Edit, click your name, select the check boxes for the permissions that you must have, and then click OK.
How do I share files between two computers Windows 7?
Step 1. Open drive or partition in Windows 7 Explorer, right-click on the folder or files that you want to share, and select "Share with" > Choose "Specific people...". Step 2. Choose "Everyone" in the drop-down menu on File Sharing, click "Add" to confirm.
How do I fix I need permission to perform this action Windows 7?
5 Fixes for the "You Need Permission to Perform This Action"...Check Your Windows User Account Type. ... Take Full Control of the File or Folder. ... Add Yourself to the Administrators Group. ... Boot into Safe Mode. ... Run SFC and CHKDSK.
How do I set up file sharing in Windows 7?
Let's start to enable file sharing in Windows 7, right click the file or folder you plan to share, select Share with and click on Specific people.... Note: If you don't see the Share with menu, you might be trying to share an item on a network or other unsupported location.
How to Enable Remote Desktop
The simplest way to allow access to your PC from a remote device is using the Remote Desktop options under Settings. Since this functionality was a...
Should I Enable Remote Desktop?
If you only want to access your PC when you are physically sitting in front of it, you don't need to enable Remote Desktop. Enabling Remote Desktop...
Why Allow Connections only With Network Level Authentication?
If you want to restrict who can access your PC, choose to allow access only with Network Level Authentication (NLA). When you enable this option, u...
How to allow remote access to PC?
The simplest way to allow access to your PC from a remote device is using the Remote Desktop options under Settings. Since this functionality was added in the Windows 10 Fall Creators update (1709), a separate downloadable app is also available that provides similar functionality for earlier versions of Windows. You can also use the legacy way of enabling Remote Desktop, however this method provides less functionality and validation.
How to remotely connect to Windows 10?
Windows 10 Fall Creator Update (1709) or later 1 On the device you want to connect to, select Start and then click the Settings icon on the left. 2 Select the System group followed by the Remote Desktop item. 3 Use the slider to enable Remote Desktop. 4 It is also recommended to keep the PC awake and discoverable to facilitate connections. Click Show settings to enable. 5 As needed, add users who can connect remotely by clicking Select users that can remotely access this PC .#N#Members of the Administrators group automatically have access. 6 Make note of the name of this PC under How to connect to this PC. You'll need this to configure the clients.
How to connect to a remote computer?
To connect to a remote PC, that computer must be turned on, it must have a network connection, Remote Desktop must be enabled, you must have network access to the remote computer (this could be through the Internet), and you must have permission to connect. For permission to connect, you must be on the list of users. Before you start a connection, it's a good idea to look up the name of the computer you're connecting to and to make sure Remote Desktop connections are allowed through its firewall.
Should I enable Remote Desktop?
If you only want to access your PC when you are physically using it, you don't need to enable Remote Desktop. Enabling Remote Desktop opens a port on your PC that is visible to your local network. You should only enable Remote Desktop in trusted networks, such as your home. You also don't want to enable Remote Desktop on any PC where access is tightly controlled.
What are remote desktop services permissions?
Remote Desktop Services permissions can be granted, or set, for individual users or groups. Users can also inherit permissions as a result of being a group member. The denial of a permission, however, overrides an inherited permission. For example, members of the Remote Desktop Users (RDU) group are granted the Query permission by default. If an Administrator sets the Query permission to "Deny" for that user, the user will not be able to query another user's session. After a user logs on to a session, the user is granted all other Remote Desktop Services permissions for his or her session.
What is the logon permission?
The Logon permission is required for a user to log on to a new Remote Desktop Services session. All other Remote Desktop Services permissions apply to controlling another user's Remote Desktop Services session.
How to grant permissions to a folder in Windows 7?
How to Grant Permissions in Windows 7. 1. Locate the file or folder on which you want to take ownership in windows explorer. 2. Right click on file or folder and select “Properties”from Context Menu. 3. Click on Edit button in Propertieswindows Click ok to confirm UAC elevation request. 4.
How to take ownership of a folder in Windows 7?
Locate the file or folder on which you want to take ownership in windows explorer. 2. Right click on file or folder and select “Properties”from Context Menu. 3. Click on Security tab. 4. Click on “Advance”.
Does Windows 7 give permission to access files?
Windows 7 Take Ownership & Grant Permissions to Access Files & Folder. Grant Full Access Permissions, take ownership in windows 7.
Does Windows 7 have security?
Windows 7 has implemented addition security mechanismto prevent accidental or intentional file or folder modification by not allowing users other then owner of file or folder to accessit. Hence incase if you need to access, modify or delete such files or folder you need to take ownership firstthen assign rights or permissionto respective users. Here is Guide on How to take Ownership and Grant Permission in Window 7.
2 - Allowing WMI counters access
We need to allow the user to access to the WMI counters. First we will be adding the user account to the local group named Performance Log Users:
3 - Allowing Windows Service Configuration Manager Access
We need to grant the user Windows Service Configuration Manager Access.
4 - Validating remote PowerShell connectivity
To validate remote PowerShell connectivity from the system that is running GSX Monitor, open a PowerShell console and enter the following commands:
How to check permissions on a file?
In Windows Explorer, right-click the file or folder you want to work with. From the pop-up menu, select Properties, and then in the Properties dialog box click the Security tab. In the Name list box, select the user, contact, computer, or group whose permissions you want to view.
How to change permissions in Windows 10?
Now that you own the files, you have to give yourself permission to modify them. 1) R-Click on Program Files -> Properties -> Security Tab. 2) Click Advanced -> Change Permission. 3) Select Administrators (any entry) -> Edit. 4) Change the Apply To drop down box to This Folder, Subfolder & Files.
What does it mean when your permissions are dimmed?
If the permissions are dimmed, it means the permissions are inherited from a parent object. Before you can do anything, you must turn off the UAC, or you will be locked out of the following steps. Yes take ownership. Even though you are logged on as an Administrator, you can't change files that don't belong to you.